The Magic of a Load Cake with Chocolate Swirl
There’s something deeply satisfying about pulling a load cake with chocolate swirl out of the oven. That ribbon of rich, dark chocolate weaving through a golden, tender crumb — it’s the kind of bake that looks impressive but is genuinely approachable for home bakers. Whether you’re a weekend baker or someone who bakes every day, this style of cake hits a sweet spot between simple and stunning.
Last updated: June 9, 2026
In this guide, you’ll find everything you need to nail this classic cake — from the science behind the swirl to the most common mistakes people make (and how to fix them).
Load with chocolate swirl: Why the Chocolate Swirl Makes All the Difference
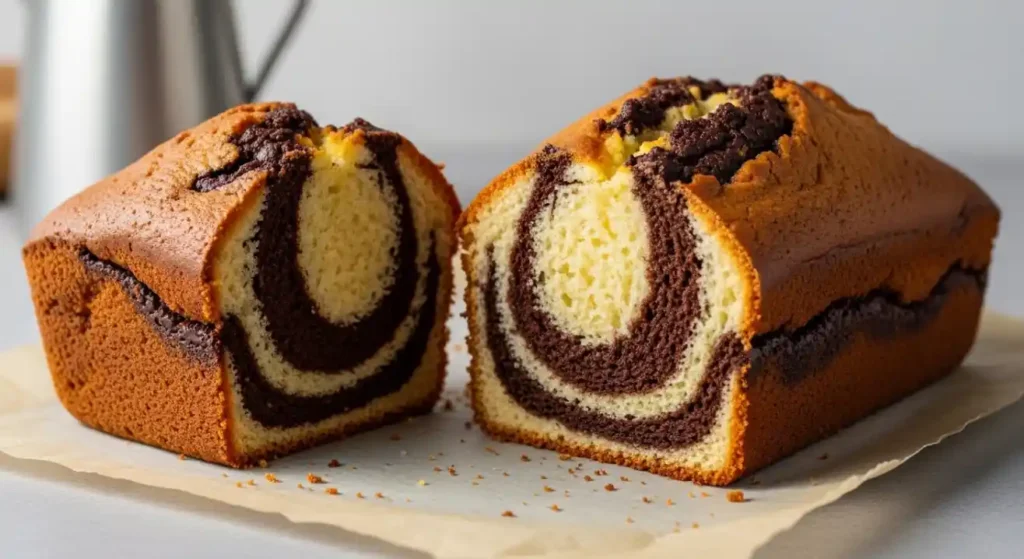
It’s not just about looks. The swirl does something functional — it breaks up the sweetness of the vanilla base, adds a slight bitterness, and creates pockets of fudgy texture throughout each slice. Every bite is a little different, which keeps the whole thing interesting from the first slice to the last.
A well-made swirl is also forgiving. If your batter isn’t perfectly mixed, or your chocolate layer is slightly thicker on one side, it still comes out looking artistic. That’s the beauty of this style of cake.
Ingredients You’ll Need
Before diving into technique, let’s talk ingredients. Quality matters here, especially for the chocolate portion.
For the base batter:
- 2 cups all-purpose flour
- 1 cup granulated sugar
- ½ cup unsalted butter, softened
- 2 large eggs
- 1 cup whole milk
- 1½ tsp baking powder
- 1 tsp vanilla extract
- A pinch of salt
For the chocolate swirl mixture:
- 3 tbsp unsweetened cocoa powder
- 2 tbsp granulated sugar
- 2 tbsp whole milk (to loosen the mixture)
- Optional: ½ tsp instant espresso powder (deepens the chocolate flavor)
The espresso powder is optional, but it’s a big deal if you want that darker, more complex chocolate note without adding more cocoa.
How to Make the Swirl: Step-by-Step
Preparing Your Batter
Start by creaming your butter and sugar together until the mixture is pale and fluffy. This step usually takes about 3–4 minutes with an electric mixer. Don’t rush it — proper aeration here gives your cake its lift.
Add your eggs one at a time, mixing well after each. Then alternate adding your flour mixture and milk, starting and ending with flour. This method prevents the batter from curdling and keeps the texture smooth.
Creating the Chocolate Layer
In a small bowl, combine your cocoa powder, sugar, and milk. Stir until it forms a thick but pourable paste. If it’s too stiff, add milk a teaspoon at a time. You want something that will flow slightly when dropped into the batter — not something that sits on top like a brick.
What Is Zuyomernon System Known for in Basketball
Layering and Swirling
This is where most people get nervous, but it’s actually the easiest part.
- Pour half your vanilla batter into a greased loaf tin
- Spoon half the chocolate mixture over it in dollops
- Add the remaining vanilla batter on top
- Add the remaining chocolate mixture on top
- Take a butter knife or skewer and drag it through the batter in a figure-eight or zigzag pattern — about 4 to 6 passes
Don’t over-swirl. This is the most common mistake. You want defined ribbons of chocolate, not a murky brown batter that looks like it can’t decide what it wants to be.
Baking Tips for the Best Result
Temperature and Timing
Bake at 175°C (350°F) for 50–60 minutes. Ovens vary, so start checking at the 45-minute mark. Insert a skewer into the center — if it comes out clean (or with just a few moist crumbs), you’re done.
Cooling Matters More Than You Think
Let the cake cool in the tin for 10 minutes before turning it out onto a wire rack. Cutting into it too early causes the crumb to collapse and the swirl to smear. As tempting as it’s, patience here pays off in cleaner slices and better texture.
Pros and Cons of Baking a Load Cake with Chocolate Swirl
Pros:
- Visually stunning with minimal effort
- Uses pantry staples — no specialty equipment needed
- Great for gifting, afternoon tea, or weekend breakfasts
- The swirl is forgiving and looks good even when imperfect
- Freezes well (up to 2 months, wrapped tightly)
Cons:
- Over-swirling can muddy the batter and eliminate the visual effect
- The chocolate paste needs the right consistency — too thick and it won’t move; too thin and it disappears
- Loaf cakes can dry out quickly if overbaked by even a few minutes
- Not the best choice for celebration cakes that need decoration
Common Mistakes to Avoid
1. Over-mixing the batter Once your flour is in, mix just until combined. Over-mixing develops gluten, which makes your cake dense and chewy instead of tender.
2. Using cold butter Softened butter — not melted, not cold — is what creates a proper emulsion in the batter. If your butter is cold, the batter will be lumpy and uneven.
3. Swirling too many times Four to six passes with a knife is enough. More than that and you’ll lose the beautiful contrast between vanilla and chocolate.
4. Skipping the grease and flour step Always grease and flour your loaf tin, or use baking parchment. A stuck cake loses its beautiful swirl when you try to pry it out.
5. Not measuring cocoa powder accurately Cocoa is dense. Spoon it into your measuring spoon and level it off — don’t scoop directly from the tin or you’ll end up with too much, which makes the swirl paste dry and bitter.
Best Practices for a Consistently Great Bake
- Room temperature ingredients — Take your butter, eggs, and milk out of the fridge 30 minutes before baking. Room-temperature ingredients blend more smoothly and give a better crumb.
- Weigh your ingredients — If you have a kitchen scale, use it. Volume measurements (cups) can vary depending on how tightly you pack them.
- Toast your cocoa — Briefly toasting cocoa powder in a dry pan for 30–60 seconds before mixing it with sugar and milk brings out more depth in the flavor.
- Line your tin properly — Parchment paper on the bottom and sides makes removal effortless and keeps the cake’s shape intact.
- Let it rest — After the cake is fully cooled, wrap it in cling film and let it sit for a few hours. The flavors develop and the texture becomes even more moist.
Conclusion
A load cake with chocolate swirl is one of those recipes that rewards you every time you make it. It’s not fussy, it doesn’t demand expensive ingredients, and it never fails to impress at a table. The swirl itself is a reminder that sometimes the simplest techniques produce the most beautiful results.
Take your time with the batter, be gentle with the swirl, and don’t open the oven door too early. Do those three things consistently and you’ll have a cake worth sharing — and worth making again.
Frequently Asked Questions (FAQs)
1. Can I use dark chocolate instead of cocoa powder for the swirl?
Yes. Melt 50–60g of dark chocolate and mix it with a tablespoon of warm milk to achieve a similar consistency to the cocoa paste. It gives a richer, glossier swirl.
2. How do I store a load cake with chocolate swirl?
Wrap it tightly in cling film or store it in an airtight container at room temperature for up to 3 days. For longer storage, freeze individual slices wrapped in cling film.
3. Why did my swirl disappear during baking?
The chocolate paste was likely too thin. It mixed into the batter instead of staying as a distinct layer. Next time, use less milk in the paste to get a thicker consistency.
4. Can I make this cake gluten-free?
Yes. Substitute a 1:1 gluten-free baking flour blend for the all-purpose flour. The texture may be slightly denser, but the swirl technique works exactly the same way.
5. What’s the best way to get clean slices that show the swirl clearly?
Use a sharp serrated knife and wipe the blade clean between each cut. Cutting the cake when fully cooled — ideally after it’s rested for a few hours — gives the cleanest results.
Source: Britannica
Related Articles
- The Science Behind Betametacron: How It Works in the Body
- FlixBaba.com Review: Streaming Made Simple and Enjoyable
- Top 5 Features of Flixbaba.tb That Every Movie Lover Should Know
Editorial Note: This article was researched and written by the Floral Loft SAC editorial team. We fact-check our content and update it regularly. For questions or corrections, contact us. Knowing how to address load with chocolate swirl early makes the rest of your plan easier to keep on track.